Swift Tutorial: An Introduction to the MVVM Design Pattern
Published on 06 February 17
 Michelle
0
1
So you’re starting a new iOS project, you received from the designer all the .pdf.sketch
You start transferring UI screens from the designer’s sketches ViewController.swift.xib .storyboard
UITextField here, UITableView there, a few UILabelsUIButtons. IBOutlets IBActions
However, it’s time to do something with all these UI elements; UIButtons will receive finger touches, UILabels UITableViews
8
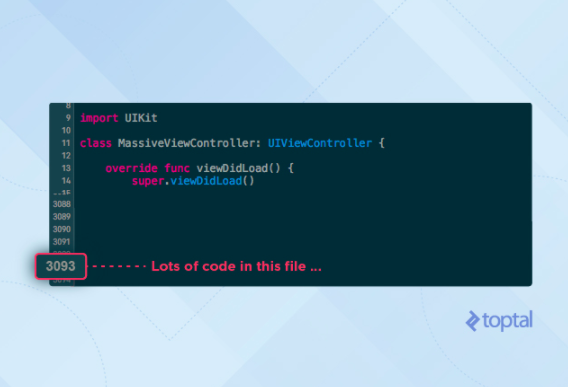
You ended up with a lot of spaghetti code.
The first step to
1
Dealing with Spaghetti Code
In no time, your ViewController
Networking code, data parsing code, data adjustments code for the UI presentation, app state notifications, UI state changes. All that code imprisoned inside if-ology of a single file that cannot be reused and would only fit in this project.
ViewController
How did that happen?
The likely reason is something like this:
You were in a rush to see how the back-end data was behaving inside UITableViewViewController.json.json
ViewControllerifif-ology.
But, how come UIViewController
UIViewControllerUIViewControllers
UIViewController13
Upgrading the MVC Design Pattern

In the MVC design pattern, View is supposed to be inactive and only displays prepared data on demand.
As mentioned, UIViewController is usually the starting point in building a UI screen. Notice that in its name, it contains both the view and the controller. This means that it controls the view. It doesn’t mean that both controller and view code should go inside.
This mixture of view and controller code often happens when you IBOutletsUIViewControllerUIViewControllerUIView
7
MVVM to the Rescue
This is where the MVVM pattern comes in handy.
UIViewController1

In the MVVM design pattern, Model is the same as in MVC pattern. It represents simple data.
UIViewUIViewController.xib.storyboardNSDateFormatter
Only a simple, formatted string that comes from the ViewModel.
ViewModel hides all asynchronous networking code, data preparation code for visual presentation, and code listening for Model changes. All of these are hidden behind a well-defined API modeled to fit this particular View.
One of the benefits of using MVVM is testing. Since ViewModel is pure NSObject (structUIKit
UIViewController/UIView) has become much simpler while ViewModel acts as the glue between the Model and View. 9
Applying MVVM in Swift

To show you MVVM in action, you can download and examine the example Xcode project created for this tutorial here. This project uses Swift 3 and Xcode 8.1.
There are two versions of the project: Starter and Finished.
The Finished version is a completed mini application, where Starter is the same project but without the methods and objects implemented.
First, I suggest you download the Starter1
Tutorial Project Introduction
The tutorial project is a basketball application for the tracking of player actions during the game.
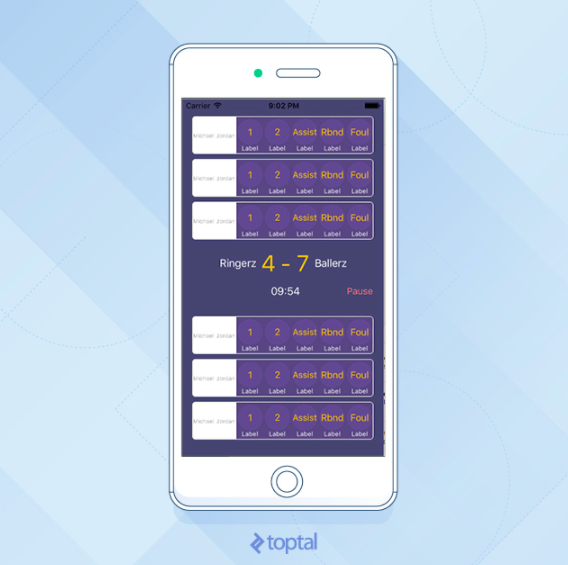
It’s used for the quick tracking of user moves and of the overall score in a pickup game.
Two teams play until the score of 15 (with at least a two-point difference) is reached. Each player can score one point to two points, and each player can assist, rebound, and foul.
Project hierarchy looks like this: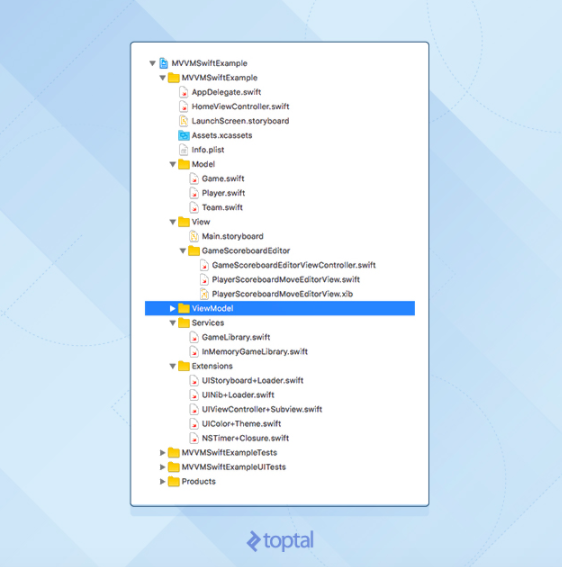
Model
Game.swift- Contains game logic, tracks overall score, tracks each player’s moves.
Team.swift- Contains team name and players list (three players in each team).
Player.swift- A single player with a name.
View
HomeViewController.swift- Root view controller, which presents the
GameScoreboardEditorViewController
- Root view controller, which presents the
GameScoreboardEditorViewController.swift- Supplemented with Interface Builder view
in Main.storyboard. Screen of interest for this tutorial.
- Supplemented with Interface Builder view
PlayerScoreboardMoveEditorView.swift- Supplemented with Interface Builder view in
PlayerScoreboardMoveEditorView.xib - Subview of the above
view, also uses MVVM design pattern.
- Supplemented with Interface Builder view in
3
ViewModel
ViewModelgroup is empty, this is what you will be building in this tutorial.
The downloaded Xcode project already contains placeholders for the View objects (UIView and UIViewController). The project also contains some custom-made objects made to demo one of the ways on how to provide data to the ViewModel objects (Services group).
Extensions
If you run the app at this point, it will show the finished UI, but nothing happens, when a user presses the buttons.
This is because you’ve only created viewsIBActionsGame4
This blog is listed under
Development & Implementations
Community
Related Posts:
Post a Comment
You may also be interested in
Share your perspective

Share your achievement or new finding or bring a new tech idea to life. Your IT community is waiting!


